Rye and Whole Wheat Bread with Nuts
Nutty Rye and Whole Wheat Bread for Dieters

When I bake, I often use whole wheat or rye flour because I worry about gaining weight from regular flour. This way, I feel I can enjoy a healthier bread. This recipe combines the wholesome goodness of whole wheat and rye flours with the delightful crunch of nuts and the sweet chewiness of raisins, making it a satisfying and guilt-free option for those mindful of their diet.
Ingredients- 80g Raisins
- 80g Walnuts
- 150g Whole wheat flour
- 150g Rye flour
- 180g Water
- 5g Salt
- 5g Instant dry yeast
- 5g Canola oil
Cooking Instructions
Step 1
In a large bowl, combine 150g of whole wheat flour and 150g of rye flour. Mixing these flours creates a bread with a richer, more complex flavor profile.

Step 2
Make a well in the center of the flour mixture. Add 5g of salt to one side and 5g of instant dry yeast to the other side, ensuring they don’t directly touch each other. This prevents the salt from inhibiting the yeast’s activity.

Step 3
Pour in 5g of canola oil. The oil will help to make the bread softer and more tender.

Step 4
Gradually add 180g of warm water while mixing with your hands or a dough hook. Continue kneading until a cohesive dough forms and no dry flour remains. Knead until the dough is smooth and elastic.

Step 5
Once the dough has come together, incorporate 80g of raisins and 80g of roughly chopped walnuts. Gently mix them into the dough, ensuring they are evenly distributed. These additions will provide delightful texture and flavor bursts.

Step 6
Continue kneading the dough until the raisins and walnuts are well incorporated and the dough is smooth and pliable. Thorough kneading is key for a good bread texture.

Step 7
Place the dough in a lightly oiled bowl, cover with plastic wrap or a damp cloth, and let it undergo its first rise (bulk fermentation). In summer, this typically takes about 1 hour, while in winter, it may take around 2 hours. Find a warm spot, perhaps covered with a blanket, for the dough to double in size.

Step 8
Once the dough has doubled, gently punch it down to release the gases. Divide the dough into two equal portions. Shape each portion into a ball (round off) and let them rest, covered, for 20 minutes. This intermediate resting period, called bench rest, allows the gluten to relax, making the dough easier to shape.

Step 9
Shape each dough ball into your desired loaf shape (e.g., an elongated oval). Score the top of each loaf with a sharp knife or lame to allow for even expansion during baking. Cover the loaves again and let them proof for a second time for about 40 minutes, until they appear puffy.

Step 10
Preheat your oven to 200°C (390°F). Just before baking, place a small oven-safe dish filled with water inside the oven. This creates steam, which helps achieve a crispier crust. Place the proofed loaves on a baking sheet and into the preheated oven.

Step 11
Bake the bread at 200°C (390°F) for approximately 25 minutes, or until the crust is golden brown and the internal temperature reaches about 93°C (200°F). The aroma filling your kitchen will be wonderful!

Step 12
Your delicious homemade rye and whole wheat bread is ready! Remove the bread from the oven and let it cool on a wire rack for at least 30 minutes before slicing. Cooling is crucial to allow the internal structure to set.

Step 13
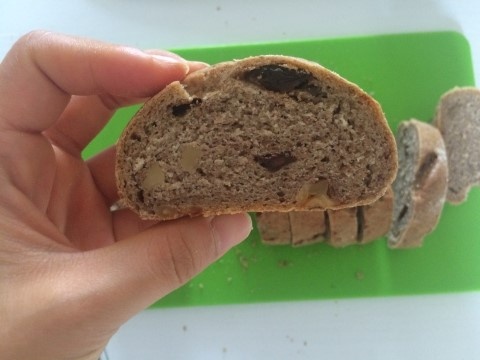
Slicing the bread once it’s completely cooled will result in clean, beautiful slices. While freshly baked bread is always tempting, patience during cooling ensures the best texture and appearance.

Step 14
Although perhaps not as polished as store-bought bread, this is a healthy and delicious loaf made with your own hands! The nutty flavor and satisfying chew make it perfect for a healthy snack, breakfast, or even a light meal. Enjoy your wholesome creation!


