SNS Viral Chewy Milk Mochi Recipe
The Ultimate Chewy Treat: Easy Homemade SNS Popular Milk Mochi

Hello everyone! Milk is power, as they say. Consuming two cups of milk daily can offer benefits like preventing osteoporosis, boosting immunity, regulating blood sugar, and aiding digestion. Recently, ‘Milk Mochi’ has been trending on social media, gaining even more attention after singer Moon Hee-jun made it for his daughter on a TV show. While some say it requires stirring 400 times, it actually takes much less! Let’s dive into making this ultimate chewy delight, the Milk Mochi.
Essential Ingredients- 250ml Milk
- 35g Starch (Sweet potato starch or corn starch)
- 25g Sugar
- Ice water (for shaping)
- Honey (optional, for drizzling)
Cooking Instructions
Step 1
First, prepare your ingredients: 250ml of milk, 35g of starch, and 25g of sugar. While regular white milk works perfectly, you can create visually appealing mochi by using flavored milks like banana, chocolate, or strawberry milk! The type of starch used, whether sweet potato or corn starch, doesn’t matter.

Step 2
In a pot, combine the sugar and starch. Add just a small amount of milk and stir until it forms a smooth paste without lumps. Pre-mixing like this helps prevent the starch from clumping when you add the rest of the milk.

Step 3
Now, gradually add the remaining milk in 2-3 additions, stirring continuously. Adding the milk bit by bit ensures a smoother batter without any lumps.

Step 4
Place the pot over low heat. Using a spatula or whisk, stir the mixture constantly to prevent it from burning or sticking to the bottom. Continuous stirring is key!

Step 5
The secret to chewy mochi lies in proper stirring! Continue stirring vigorously, as if you’re trying to incorporate plenty of air into the mixture. You’ll notice the starch activating, and the mixture will begin to thicken and coalesce.

Step 6
Keep stirring until the mixture reaches a consistency similar to melted mozzarella cheese – thick, stretchy, and stringy. This stage is crucial for achieving that signature chewy texture.

Step 7
Isn’t it fascinating how the mixture transforms into a cheese-like consistency? This unique texture is what makes Milk Mochi so special!

Step 8
Transfer the cooked mixture into a zip-top bag. The prettiest way to shape them is by snipping off the corner of the bag and piping them out. However, for those without piping bags, using a zip-top bag is a great alternative. Alternatively, you can pour the mixture into an airtight container, tap it firmly on the counter to release air bubbles, let it chill and set in the refrigerator, and then slice it with a knife.

Step 9
Carefully snip off a small corner of the zip-top bag with kitchen scissors to prepare for piping. Be cautious not to cut too large an opening, as it might result in misshapen mochi.

Step 10
Have a bowl of ice water ready. Pipe out the milk mochi mixture into the ice water, forming your desired lengths. The cold water helps the mochi firm up and hold its shape.

Step 11
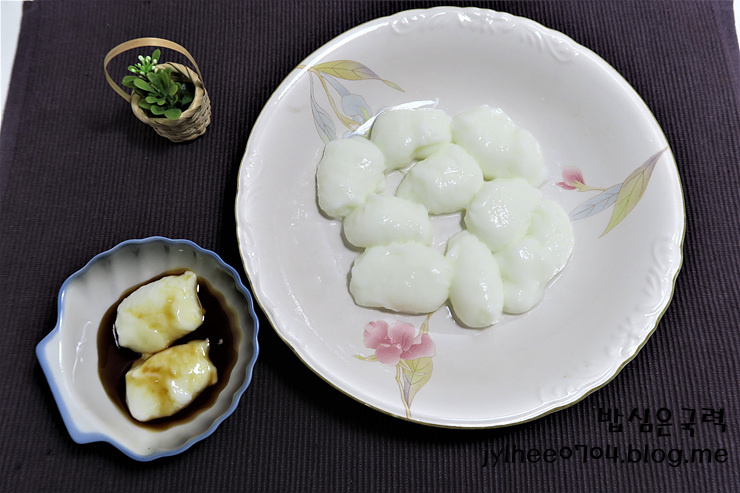
Allow the piped mochi to firm up further in the ice water for a moment, then carefully lift them out with a strainer, letting excess water drip off. Your wonderfully chewy and bouncy Milk Mochi is ready! You can optionally drizzle some honey over them for an extra touch of sweetness.


