Sparkling Refreshment! Making Delicious Winter Dongchimi
Homemade Dongchimi Recipe: The Perfect Harmony of Refreshing Broth and Crisp Radish

Enjoy a winter delicacy, Dongchimi, made right at home! After about 20 days of fermentation, you can savor the delightful balance of its sweet, sour, and refreshing broth with crisp radish. It’s a perfect accompaniment to a warm bowl of noodles or a wonderful pairing with winter snacks like sweet potatoes, making your table even richer. Fill a kimchi container with this lovingly homemade Dongchimi and enjoy a delicious winter season.
Main Ingredients- 20 Dongchimi radishes
- 10 cups rock salt (for brining radish)
- 1 cup fermented chili peppers
- 1 bunch green onions
- 10 whole garlic cloves
- 2 ginger roots (dried ginger can be used)
- 1/2 pear
- 1/2 apple
- 5 radish roots (from green onions)
- 1 handful dried seaweed (Cheonggak)
- Filtered water or plain water, as needed
- 700ml cider (for the broth, adjust to taste)
Cooking Instructions
Step 1
First, let’s prepare the secondary ingredients that will add flavor to the Dongchimi. The chili peppers fermented in summer have turned a nice yellowish hue and are ready! Trim the green onions and set them aside. Peel and thinly slice the whole garlic cloves. If using dried ginger, use a small amount; if using fresh ginger, peel and slice it thinly. Peel the pear and apple, then cut them into bite-sized pieces. Rinse the dried seaweed thoroughly under cold water and squeeze out any excess moisture. (Tip: For instructions on how to ferment chili peppers, please refer to this link: http://blog.naver.com/wjdtj54/220787525731)

Step 2
Wash the Dongchimi radishes thoroughly and pat them dry. Rub each radish generously with the rock salt to brine them. Layer the brined radishes neatly into the kimchi container. Although the container may seem full at first, the radishes will shrink as they are salted and release their water.

Step 3
The next day, you’ll notice that the radishes have significantly reduced in volume due to salting. Since there wasn’t enough space for other ingredients on the first day, we’ll add the fermented chili peppers, sliced pear and apple, spice pouch (containing chili seeds, garlic, ginger, etc.), and dried seaweed today.

Step 4
Place the garlic, ginger, and chili seeds into a spice bag (a small mesh or cheesecloth pouch). Rehydrate the dried seaweed in water, rinse it well, squeeze out the excess water, and place it in the spice bag as well. This makes it convenient to remove the solids later.

Step 5
Place the spice bag at the bottom of the kimchi container. Arrange the trimmed green onions on top, and sprinkle a generous amount of salt over them to further help the radishes brine.

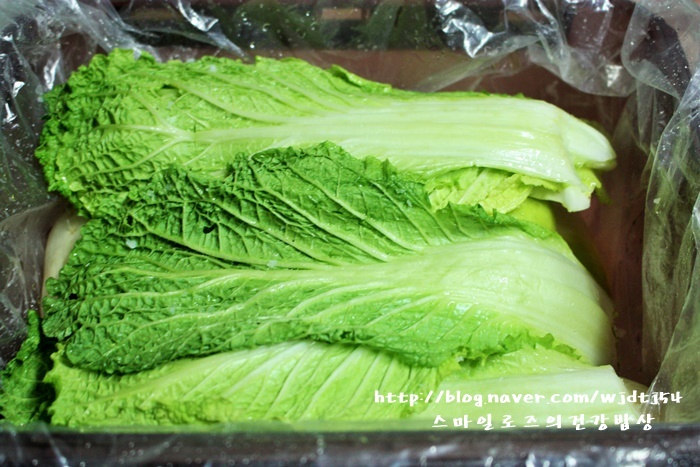
Step 6
Last year, I tried salting and adding a few pieces of napa cabbage to the Dongchimi, and it turned out wonderfully, tasting much like Baechu Kimchi (napa cabbage kimchi). This year, I harvested one napa cabbage from my garden, washed it, and placed it on top of the Dongchimi, sprinkling a little salt. This helps prevent the radish from floating to the surface and keeps the broth clear.

Step 7
Twist the opening of the plastic bag around the top of the container and seal it tightly. Ensuring an airtight seal is crucial.

Step 8
After about 3 days, open the container to check on the radishes. They should be well-brined and have shrunk. Carefully reposition the spice bag to the bottom and gently roll the green onions on top to keep them tidy and presentable.

Step 9
Three days later, it’s time to add the brine. The previous day, I dissolved salt in filtered water and strained it through a sieve to get a clear salt solution. It’s best to make the brine slightly saltier than you prefer. You can always dilute it with water later if it’s too salty, but a weak brine can cause the radishes to become mushy. (Tip: To achieve a fizzy, tangy broth, adding Korean radish greens (gat) is ideal. However, if you don’t have them, adding about half a bottle of cider can impart a similar refreshing and slightly effervescent quality.)

Step 10
Pour the brine into the kimchi container, but avoid filling it to the very brim. As the Dongchimi ferments and ages, the liquid level will rise, so it’s important not to overfill it initially. (Tip: Cut up old rubber gloves you no longer use and keep them handy for sealing plastic bags. They are incredibly useful, especially during kimchi-making season, for securing bags tightly. A tight seal prevents the radish and other ingredients from floating and spoiling.)

Step 11
This is a photo of the Dongchimi I made last year. Adding red Korean radish greens gave it a beautiful color and a wonderfully fizzy broth! Dongchimi is best enjoyed after fermenting for 20 to 30 days. It reminds me of the incredibly refreshing, almost frozen Dongchimi broth I used to have in the middle of winter. A bowl of Dongchimi alongside a warm baked sweet potato makes winter even more delightful. The process isn’t difficult, and the finished Dongchimi can be used in various dishes. I hope all my readers will try making delicious Dongchimi this winter and enjoy it, perhaps with some noodles! Stay warm, take care of yourselves, and have a happy winter!


