Spicy and Sweet Dakgalbi on a Griddle
Enjoy Authentic Dakgalbi Cooked on a Hot Iron Pan!

A popular camping dish that’s incredibly delicious! Imagine the irresistible aroma of spicy Dakgalbi stir-fried on a hot iron pan – it’s enough to make your mouth water! Even if you can’t go camping, you can recreate that delicious, spicy flavor at home with this special sauce and iron pan method. This recipe provides a delightful Dakgalbi experience, reminiscent of outdoor adventures, right in your kitchen.
Dakgalbi Ingredients- 800g chicken thigh meat (cut into bite-sized pieces)
- 200g cabbage (cut into large pieces)
- 1/4 carrot (sliced thinly)
- 2 green onions (cut into large pieces)
- 10 perilla leaves (washed and cut lengthwise)
- 100g mozzarella cheese (adjust to your preference)
Special Dakgalbi Sauce- 2 Tbsp gochujang (Korean chili paste)
- 2 Tbsp soy sauce
- 2 Tbsp gochugaru (Korean chili flakes)
- 2 Tbsp minced garlic
- 2 Tbsp sugar
- 2 Tbsp maesilcheong (green plum syrup)
- 2 Tbsp sesame oil
- A pinch of black pepper
Refreshing Onion Sauce (Side Dish)- 2 Tbsp soy sauce
- 2 Tbsp sugar
- 2 Tbsp vinegar
- 2 Tbsp gochujang (Korean chili paste)
- 2 Tbsp soy sauce
- 2 Tbsp gochugaru (Korean chili flakes)
- 2 Tbsp minced garlic
- 2 Tbsp sugar
- 2 Tbsp maesilcheong (green plum syrup)
- 2 Tbsp sesame oil
- A pinch of black pepper
Refreshing Onion Sauce (Side Dish)- 2 Tbsp soy sauce
- 2 Tbsp sugar
- 2 Tbsp vinegar
Cooking Instructions
Step 1
First, let’s make the delicious sauce that will define your Dakgalbi. In a bowl, combine 2 tablespoons of gochujang, 2 tablespoons of soy sauce, 2 tablespoons of gochugaru, 2 tablespoons of minced garlic, 2 tablespoons of sugar, 2 tablespoons of maesilcheong, 2 tablespoons of sesame oil, and a pinch of black pepper. Mix everything thoroughly. Feel free to adjust the sugar and maesilcheong to your taste.

Step 2
Now, let’s prepare the main ingredients for the Dakgalbi. Rinse the chicken thigh meat and cut it into bite-sized pieces. Chop the cabbage and carrot into large pieces, and cut the green onions lengthwise. Wash the perilla leaves thoroughly and slice them lengthwise. Finally, have your mozzarella cheese ready.

Step 3
Add all the prepared special Dakgalbi sauce to the large pieces of chicken thigh meat.

Step 4
Gently mix the chicken and sauce with your hands, ensuring every piece is well-coated. Cover the marinated chicken with plastic wrap or place it in an airtight container and let it marinate in the refrigerator for at least 30 minutes. This marinating time allows the flavors to meld beautifully.

Step 5
Prepare the vegetables that will be stir-fried with the Dakgalbi. Chop the cabbage into large pieces, slice the carrot thinly, and cut the green onions into long sections.

Step 6
Thinly julienne the onion for the onion sauce. Soaking the julienned onion in cold water for about 10 minutes will help mellow its sharpness, making it more refreshing.

Step 7
Drain the julienned onion completely using a sieve. It’s important to remove excess water, as it can dilute the sauce.

Step 8
Now, let’s make the onion sauce that pairs perfectly with Dakgalbi. In a small bowl, mix 2 tablespoons of soy sauce, 2 tablespoons of sugar, and 2 tablespoons of vinegar in a 1:1:1 ratio. This tangy and sweet sauce will cut through the richness of the Dakgalbi.

Step 9
Pour the prepared onion sauce over the drained julienned onion and mix well. Serving this pickled onion alongside the Dakgalbi will enhance its overall flavor profile.

Step 10
It’s time to stir-fry the Dakgalbi! Heat an iron griddle or a heavy-bottomed skillet over medium heat. Once hot, add all the marinated chicken thigh meat to the pan and begin to stir-fry.

Step 11
Stir the chicken occasionally to prevent it from sticking. Cook until the chicken is no longer pink on the outside and is about halfway cooked through.

Step 12
When the chicken is about halfway cooked, add the prepared cabbage, carrots, and green onions to the pan. Stir-frying the vegetables with the chicken will release their juices, creating a delicious broth.

Step 13
Continue to stir-fry until the chicken is fully cooked and the vegetables are tender-crisp. Be careful not to overcook the vegetables, as they can become mushy. Stirring frequently is key to prevent sticking.

Step 14
Once the vegetables have softened slightly and the chicken is cooked, add the sliced perilla leaves to the pan. Toss them gently just until they wilt and their fragrant aroma infuses the dish.

Step 15
Now for the cheesy goodness! Sprinkle the mozzarella cheese over one side of the pan, or cover the entire dish, depending on your preference.

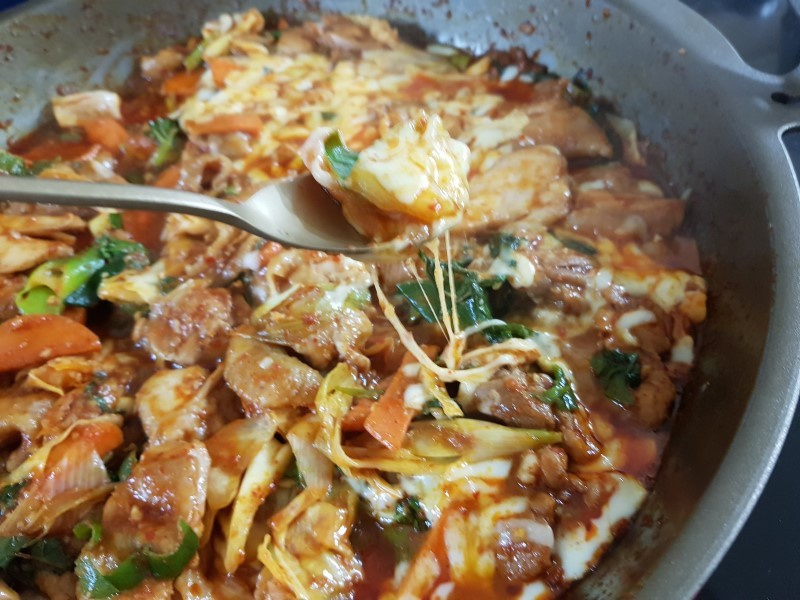
Step 16
Cover the pan or tilt it to allow the cheese to melt completely. The sight of the gloriously melted, stretchy cheese is truly appetizing! Your delicious Spicy and Sweet Dakgalbi with cheese is now ready.

Step 17
Enjoy your flavorful Dakgalbi, complete with gooey, melted cheese, straight from the hot iron pan! The griddle imparts a wonderful smoky flavor. Make your dinner special with this fantastic Dakgalbi dish tonight!


