Spicy and Tangy Pickled Peppers: Homemade with Garden Fresh Chilies
Homemade Pickled Peppers Recipe

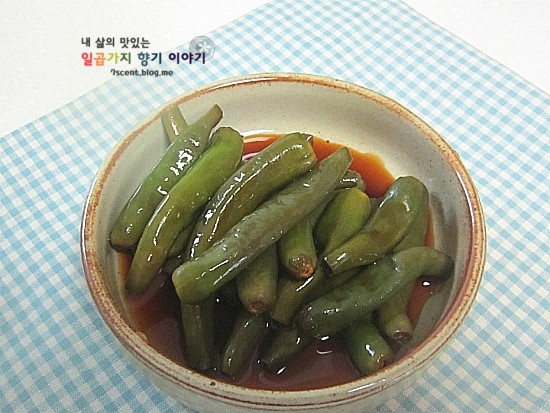
Enjoy the delightful experience of pickling small chilies harvested from your rooftop garden! These spicy and tangy pickled peppers make a wonderful addition to any meal, with 3-4 pieces adding a burst of flavor. Creating this yourself offers a uniquely satisfying and healthy side dish.
Main Ingredients- Small chilies (freshly harvested from the garden)
Pickling Brine- 2 cups soy sauce (jin ganjang)
- 1 cup vinegar
- 1 cup water
- 1 cup sugar
- 2 cups soy sauce (jin ganjang)
- 1 cup vinegar
- 1 cup water
- 1 cup sugar
Cooking Instructions
Step 1
First, carefully remove the stems from the fresh chilies. Wash them thoroughly under running water to get rid of any dirt or impurities. It’s crucial to drain them completely, preferably by letting them sit on a colander, as any residual water can cause the pickles to spoil quickly. After washing, trim just the very tip of each chili. Be careful not to cut too much, as this can affect the crisp texture.

Step 2
Trimming the tip of the chili slightly helps the pickling brine to penetrate the chili more effectively. This ensures that the soy sauce mixture’s flavor permeates the entire chili, resulting in a deeper and richer taste.

Step 3
Arrange the washed and dried chilies neatly into a clean glass jar or storage container. It’s a good idea to leave a little space rather than packing them too tightly, allowing the brine to circulate well.

Step 4
Now, let’s prepare the pickling brine. Measure out the soy sauce, vinegar, water, and sugar, and combine them in a pot. Bring the mixture to a boil, stirring until the sugar has completely dissolved and all ingredients are well combined. It is essential to let the boiled brine cool down completely before pouring it over the chilies. Pouring hot brine would cook the chilies. Once the brine has cooled, carefully pour it into the jar with the chilies.

Step 5
After 3 days, carefully pour out the brine from the jar back into the pot. Bring it to a boil again, and then let it cool down completely. Once cooled, pour it back into the jar with the chilies. Repeating this process helps to slightly reduce the saltiness of the brine, making the chilies crispier and more flavorful. This step is important for the longevity of the pickles and for deepening their taste.

Step 6
Finally, after adding the brine, ensure the chilies are submerged. You can gently press them down with a piece of plastic wrap or a small weight to keep them from floating. This ensures they pickle evenly in the brine. Seal the jar tightly and let it mature in the refrigerator for about 10 days. The flavor will deepen over time, so be patient.

Step 7
After 10 days, when you open the well-ripened pickled peppers, you’ll be greeted by delicious chilies that have absorbed the brine perfectly! These pickled peppers, with their crisp texture and delightful spicy, tangy, and sweet flavor, will surely enhance your meals. They are the perfect, readily available side dish to add joy to your table.


