Sweet & Crispy! Snoopy & Charlie Brown Valentine’s Chocolate Cookies
Crafting Chocolate Cookies with Adorable Snoopy & Charlie Brown Characters for a Special Valentine’s Day

Introducing a special chocolate cookie recipe to make Valentine’s Day even sweeter and more romantic! We’ve added a delightful twist by using crispy and sweet ‘Nunetti’ cookies as handles for the cute Snoopy and Charlie Brown-shaped cookies, making them extra special. Sandwich them with milk, strawberry, and white chocolate, and decorate with colorful sprinkles and dragées for a feast for both the eyes and the palate. These homemade chocolate cookies are perfect for expressing your affection to your loved ones with heartfelt effort. Let’s have a wonderful baking time together!
Basic Cookie Dough Ingredients- 130g cake flour
- 20g sugar
- 50g unsalted butter, at room temperature
- 1g salt
- 2g baking powder
- 1/2 large egg, at room temperature
Cooking Instructions
Step 1
Let’s gather all the ingredients needed to make these lovely Snoopy and Charlie Brown-shaped Valentine’s Day chocolate cookies! Don’t they just look delightful?

Step 2
First, we’ll make the basic cookie dough. Place 50g of unsalted butter, softened at room temperature for about 1 hour, into a mixing bowl. Using a whisk or electric mixer, cream the butter until it’s smooth and fluffy. Creaming the butter well ensures it blends perfectly with the sugar and results in a better cookie texture.

Step 3
Once the butter is smoothly creamed, gradually add 20g of sugar in 2-3 additions, mixing well with the whisk after each addition. Proper sugar incorporation prevents the cookies from becoming too hard after baking and contributes to their pleasant sweetness and crispness.

Step 4
When the sugar and butter are smoothly combined, add 1/2 of a room-temperature egg (ensure it’s not cold, as this can cause the butter to separate) and 1g of salt. Mix everything thoroughly until well combined.

Step 5
Now it’s time to add the dry ingredients. Sift 130g of cake flour and 2g of baking powder into the bowl. Sifting aerates the flour, preventing lumps and making the cookies lighter and crispier. Gently fold the flour into the wet ingredients with a spatula until no dry streaks remain and the dough just comes together into a cohesive ball.

Step 6
Once the dough forms a single ball, wrap it in plastic wrap and chill in the refrigerator for 30 minutes. While the dough is chilling, preheat your oven to 170°C (approximately 30 minutes for preheating).

Step 7
Now, let’s make the chocolate cookie dough! The process is very similar to the basic cookie dough, but with the addition of cocoa powder. Sift together 100g of cake flour, 2g of baking powder, and 30g of cocoa powder.

Step 8
Because cocoa powder absorbs moisture, the chocolate cookie dough might seem drier and harder to bring together. In this case, you may need to add a little extra egg. Start by adding half an egg, and if the dough still seems too dry, add a bit more. (The recipe calls for 1 whole egg for the chocolate dough).

Step 9
Once the chocolate dough comes together into a cohesive ball with the adjusted egg, wrap it in plastic wrap and chill in the refrigerator for 30 minutes, just like the basic dough.

Step 10
When the basic cookie dough has finished chilling, lightly dust your work surface with flour. Roll out the dough to an even thickness of about 3-5mm. Then, use your Snoopy, Charlie Brown, and heart-shaped cookie cutters to cut out the shapes. Place the cut-out cookies onto a baking sheet, ensuring there’s some space between them to prevent them from spreading into each other during baking.

Step 11
Here are the doughs cut into shapes! You can gather the leftover dough scraps, gently re-roll them, and cut out more shapes, or form them into desired shapes. Now, bake in the preheated oven at 170°C for 12-15 minutes. While the chocolate dough is chilling, you can bake the basic cookies. Once the chocolate dough is ready, cut it out and bake it similarly.

Step 12
Once both the basic and chocolate cookies are baked, carefully transfer them from the baking sheet to a wire rack and let them cool completely. Cookies must be fully cooled before assembling with chocolate to prevent them from breaking and to ensure a clean finish.

Step 13
Now, let’s prepare the chocolate for sandwiching. Melt the milk, strawberry, and white chocolates separately using a double boiler or a microwave until smooth. Transfer the melted chocolate into piping bags for easy application. If you don’t have piping bags, a zip-top bag with a small corner snipped off works just as well.

Step 14
For sandwiching, alternate between basic and chocolate cookies. Pipe a moderate amount of melted chocolate onto one side of a cooled basic cookie. I piped chocolate onto the cooled basic cookies first to prepare them for joining with the chocolate cookies.

Step 15
Before the chocolate sets, place a ‘Nunetti’ cookie on top of the melted chocolate. The ‘Nunetti’ will act as a handle, making the cookie easy to hold and eat, while also adding a delightful crunchy and sweet texture.

Step 16
Gently spread a little more melted chocolate on top of the ‘Nunetti’ cookie and carefully place a chocolate cookie on top. Allow it to set naturally. This process sandwiches the basic cookie, ‘Nunetti’, and chocolate cookie together.

Step 17
Once the chocolate has fully hardened and the cookies are securely joined, it’s time for the fun part: decorating! Apply a thin layer of melted chocolate to the top of the assembled cookie, and then decorate it creatively with sprinkles and dragées. Using dragées, in particular, can give your cookies a beautifully elegant and sparkly finish!

Step 18
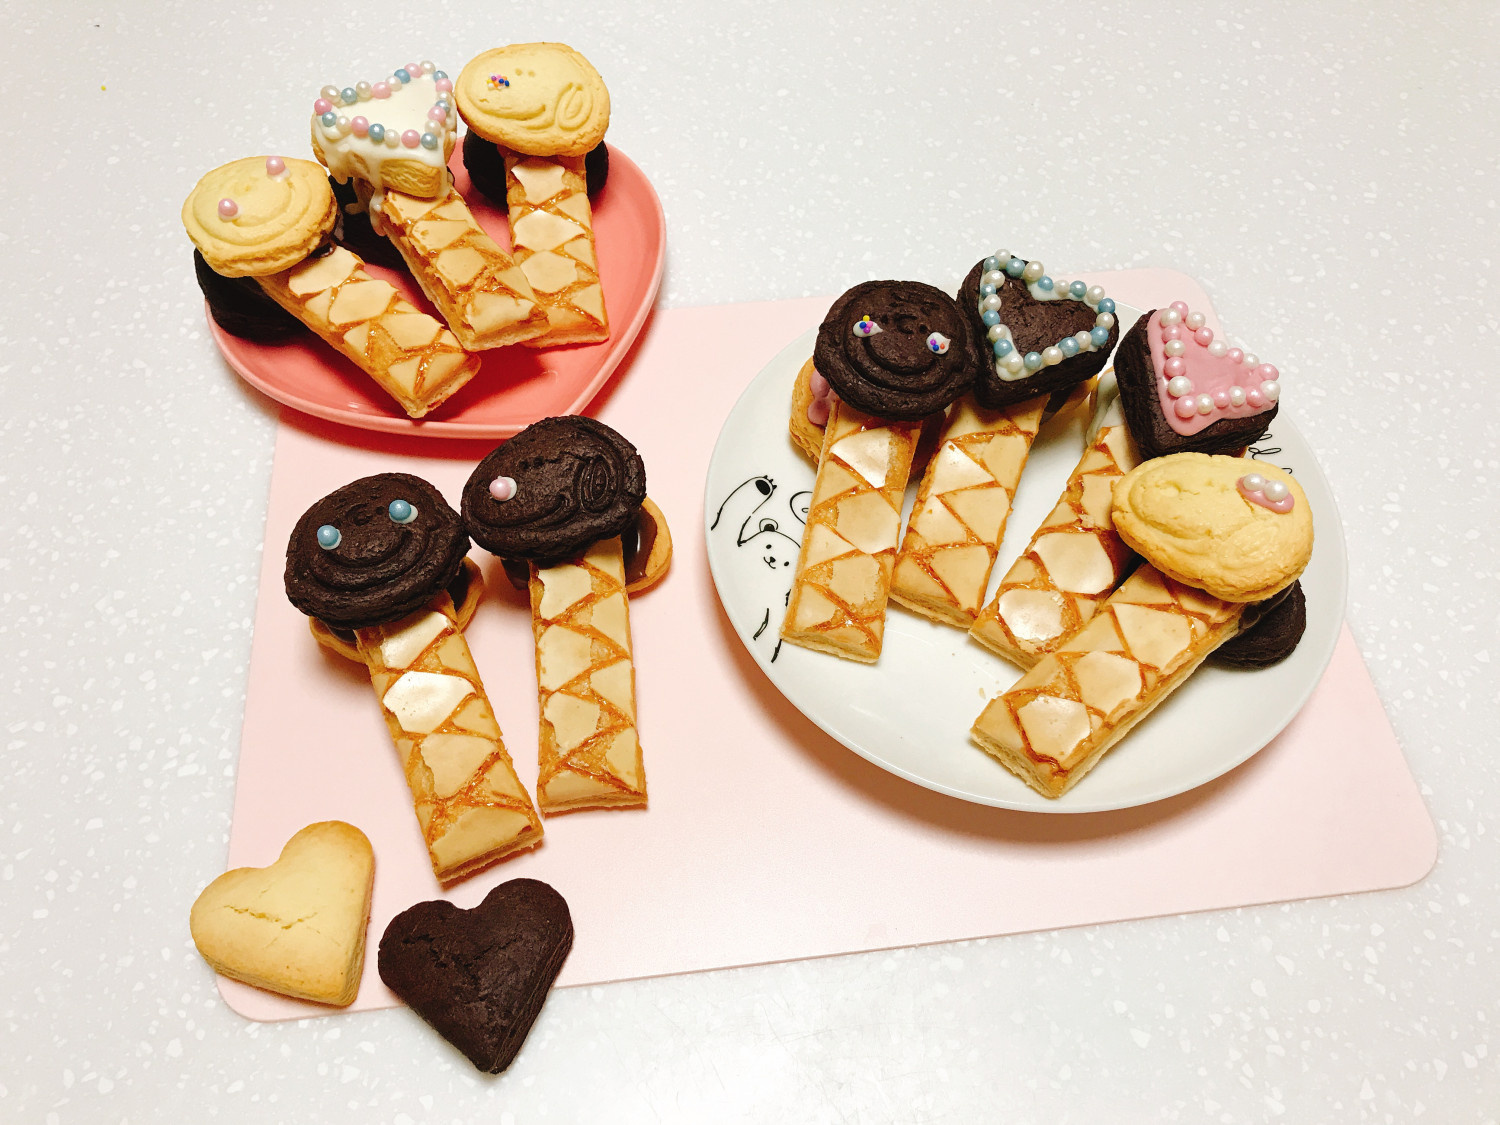
The cute Charlie Brown cookies surprisingly have a slight resemblance to a cartoon character, making them even more adorable! Even simple decorations with dragées give these cookies a festive Valentine’s Day vibe.

Step 19
The ‘Nunetti’ cookie serves perfectly as a handle, making them easy to hold and eat, while adding extra crunch and sweetness for a double dose of deliciousness! These Snoopy, Charlie Brown, and heart-shaped chocolate cookies are not only tasty but also visually stunning. Why not consider gifting these lovely homemade cookies this Valentine’s Day? Sandwich them with melted chocolate and decorate them beautifully to make your special day even more memorable!


