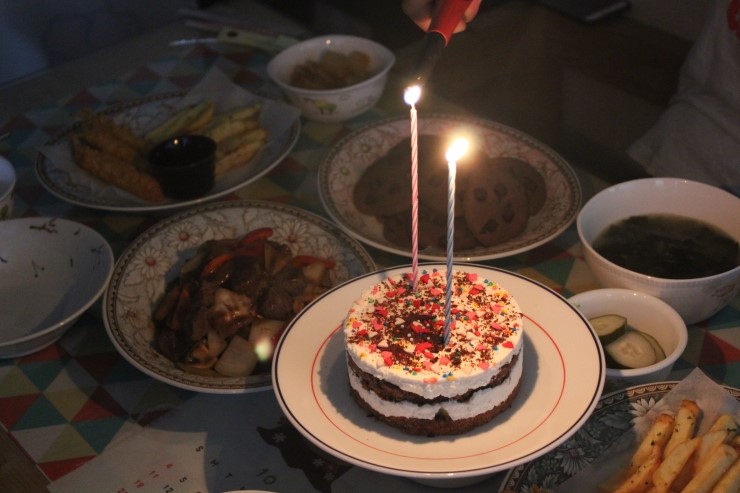
Sweet & Moist Chocolate Cream Cake for Kids
Homemade Chocolate Cream Cake Recipe

Introducing a delightful chocolate cream cake, perfect for children and the whole family! This recipe features a soft chocolate sponge (genoise) combined with a sweet cream filling. Bake it at home for a truly special celebration!
Cake Base (Genoise) Ingredients- 2 eggs
- 80g all-purpose flour
- 10g cocoa powder
- 90g sugar
- 20g melted butter
- 1g baking powder
Cooking Instructions
Step 1
First, prepare the dry ingredients for the cake sponge. Measure out 80g of all-purpose flour, 10g of cocoa powder, and 1g of baking powder into a single bowl. These ingredients will be sifted later into the batter.

Step 2
Crack 2 eggs into a clean bowl. Add 90g of sugar and whisk them together quickly. It’s important to mix well at this stage to eliminate the eggy smell and dissolve the sugar.

Step 3
Whip the mixture for at least 10 minutes. Using a hand mixer or a whisk, continue whipping until the batter becomes pale yellow, thick, and holds its shape. When you lift the whisk, the traces of the batter should remain clearly visible and not disappear easily. This step is crucial for a fluffy cake.

Step 4
Sift the prepared dry ingredients (flour, cocoa powder, baking powder) over the batter in 2-3 batches. As you sift, gently fold the ingredients into the batter using a spatula, scraping the bottom of the bowl. Mix quickly but gently until no streaks of flour are visible, being careful not to deflate the airy batter. Overmixing can develop gluten and make the cake tough.

Step 5
Take a small portion of the batter and mix it with the 20g of melted butter. Mixing the butter with a small amount of batter first helps it incorporate smoothly into the main batter without deflating it excessively. Once the butter is well combined with the small portion, gently fold this mixture back into the main batter until just combined.

Step 6
Line your cake pan with parchment paper and pour the batter into it. Smooth the surface of the batter with a spatula. Gently tap the cake pan on the counter 2-3 times to release any large air bubbles. Be careful not to tap too hard, as the batter might spill over. Bake in a preheated oven at 160-165°C (320-330°F) for about 30-35 minutes. Oven temperatures can vary, so check for doneness by inserting a skewer into the center; if it comes out clean, the cake is ready. If not, continue baking for a few more minutes.

Step 7
Prepare the whipped cream. In a chilled bowl, combine 200g of heavy cream and 30g of sugar. Whip until stiff peaks form – the cream should hold its shape when the whisk is lifted. Once the genoise sponge has cooled completely, slice it horizontally into 2 or 3 layers, depending on your desired cake height.

Step 8
For this example, I’ve sliced the genoise into two layers to create a two-tiered cake. You can slice it into three layers for a taller cake if you prefer.

Step 9
Prepare the filling. If you have fresh fruit, that’s a wonderful option! Alternatively, like me, you can use canned peaches. Dice the peaches into small pieces and reserve the syrup from the can. You can also use other fruits such as strawberries or pineapple, or even jam or chocolate ganache for a different flavor.

Step 10
Brush the syrup from the canned peaches evenly onto the surface of the bottom cake layer. This step will ensure the cake remains moist and tender.

Step 11
Applying syrup is key to preventing the cake layers from drying out and maintaining a soft texture. Be generous with the syrup application.

Step 12
Spread a generous layer of the diced peach filling over the syruped cake layer. If you love fruit, don’t hesitate to add plenty!

Step 13
Next, add a generous amount of the whipped cream on top of the peach filling. The smooth cream will blend beautifully with the fruit.

Step 14
Place the second cake layer on top of the cream. You can brush a little syrup on the underside of this layer before placing it, if desired.

Step 15
Gently press down on the top of the cake. This helps to even out the cream filling and stabilize the cake structure.

Step 16
Cover the entire cake, including the top and sides, with the remaining whipped cream. Use an offset spatula or icing knife for a smooth finish.

Step 17
Decorate the top of the cake as you wish. I’ve sprinkled grated dark chocolate and added heart-shaped and bead sprinkles for a charming look. Feel free to use fresh fruit, chocolate shavings, or powdered sugar. After decorating, chill the cake in the refrigerator for at least 1 hour to allow the cream to set. This prevents the cake from falling apart when sliced.

Step 18
This mini cake was chilled for 1-2 hours, covered with a bowl lid, before being presented on a birthday table. Enjoy your delicious homemade chocolate cream cake, made with love!


