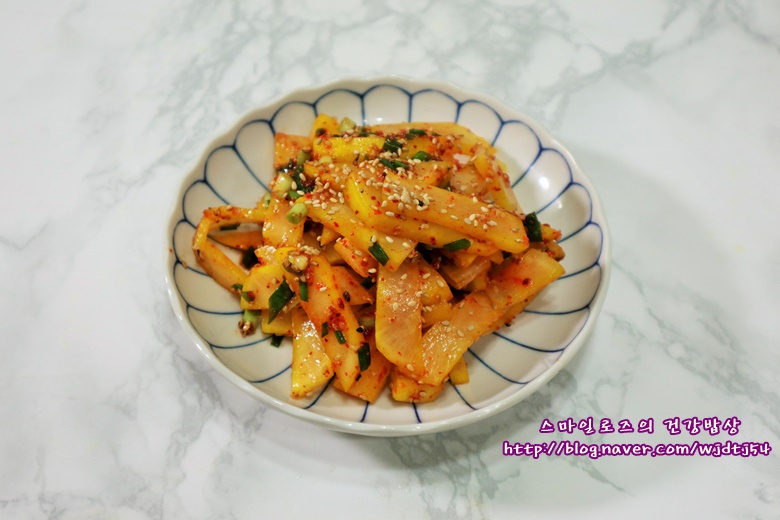
Sweet & Tangy Homemade Pickled Radish (Danmuji) & Radish Salad
Easy Recipe for Homemade Pickled Radish and Delicious Radish Salad

As the weather starts to cool, why not brighten up your table with homemade side dishes? This recipe guides you through making your own ‘Danmuji’ (Korean pickled radish), perfect for kimbap or enjoying on its own. We’ll also show you how to transform leftover danmuji into a refreshing, tangy salad. Using fresh radishes from your garden makes it extra special! Slice them about 1cm thick for perfect kimbap rolls. Even smaller radishes work wonderfully. This quick and easy danmuji salad is a real treat that will disappear in a flash. Let’s get started!
For the Pickled Radish- 2 cups Water
- 1.5 cups Sugar
- 1 cup Vinegar
- 1 Tbsp Salt
- 1/2 Tbsp Gardenia powder (for vibrant yellow color)
- 1 tsp Turmeric powder (adds color and health benefits)
- 1/2 cup Soju (or any neutral spirit like vodka; helps preserve and remove any ‘green’ smell)
For the Radish Salad- 2 slices Homemade Pickled Radish
- 2 Scallions
- 1 tsp Gochugaru (Korean chili flakes)
- 1 tsp Toasted sesame seeds
- 1 tsp Sesame oil
- 2 slices Homemade Pickled Radish
- 2 Scallions
- 1 tsp Gochugaru (Korean chili flakes)
- 1 tsp Toasted sesame seeds
- 1 tsp Sesame oil
Cooking Instructions
Step 1
First, prepare the radish for pickling. Wash the radish thoroughly, peel it, and then slice it into approximately 1cm thick pieces, similar to the length of a kimbap roll. Aim for a thickness that is neither too thin (which can make it mushy) nor too thick (which might prevent even pickling).

Step 2
Now, let’s make the pickling brine. In a pot, combine 2 cups of water, 1.5 cups of sugar, 1 cup of vinegar, 1 tablespoon of salt, 1/2 tablespoon of gardenia powder, 1 teaspoon of turmeric powder, and 1/2 cup of soju. Stir everything together well. Bring the mixture to a boil over high heat, then immediately turn off the heat. Allow the brine to cool completely. It’s crucial that the brine is cold before pouring it over the radish; otherwise, the radish might cook and become soft.

Step 3
Once the brine has cooled, strain it through a fine-mesh sieve or cheesecloth to remove any impurities, ensuring a clear and clean pickled radish. Arrange the sliced radish pieces snugly in a clean container. Pour the cooled pickling brine over the radish, making sure the pieces are fully submerged.

Step 4
To ensure the radish pickles evenly and maintains a good texture, it’s important to press it down so it stays submerged in the brine. You can use a plate that fits inside the container and place a weight on top. If your container doesn’t allow for pressing down, cover it tightly with plastic wrap and then place a heavy object on top. Seal the container with its lid and refrigerate.

Step 5
After 3 days, check on your pickled radish. You should see it starting to take on a lovely yellow hue. It’s a good idea to check its progress periodically during the pickling process.

Step 6
On the 5th day, the color of the pickled radish will be even more vibrant and appetizing. By this time, it should be well-infused with flavor and ready to be enjoyed.

Step 7
Let’s make a quick salad with two slices of the homemade danmuji. The outside should be beautifully yellow, but if you slice it and the inside isn’t fully colored, it might need a little more pickling time. However, it will still be delicious when mixed!

Step 8
Finely chop the two slices of pickled radish into bite-sized pieces (about 1cm wide). In a bowl, combine the chopped radish with 2 chopped scallions, 1 teaspoon of gochugaru (Korean chili flakes), and 1 teaspoon of toasted sesame seeds. Gently mix to ensure the seasonings are evenly distributed.

Step 9
Finally, drizzle in 1 teaspoon of sesame oil and toss everything together gently. Your delicious, crunchy, and tangy danmuji salad is ready! Enjoy this refreshing salad that’s sure to awaken your appetite.


