Tender Chicken Thigh Porridge (Dakjuk)
Easy Pressure Cooker Chicken Thigh Porridge Recipe: Simple, Nutritious, and Flavorful

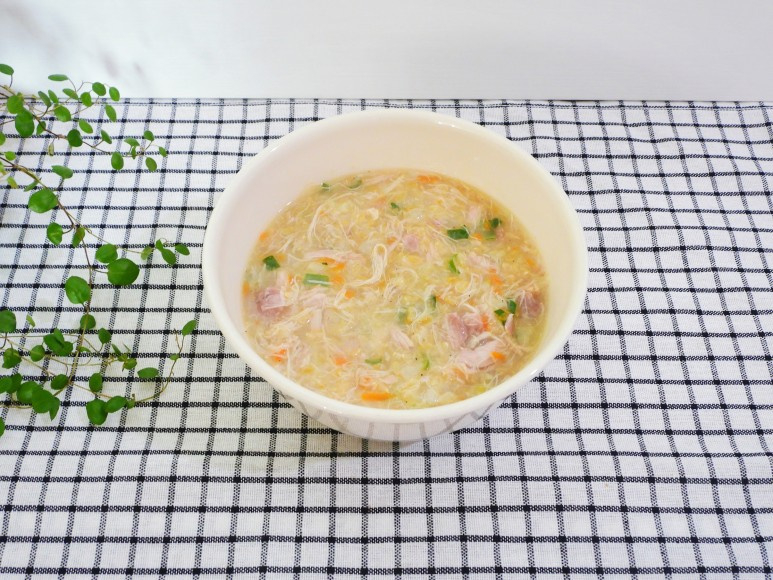
This is a simple and quick recipe to make tender chicken thigh porridge (dakjuk) using a pressure cooker, perfect for when you need a comforting and nourishing meal. Using chicken thighs makes preparation a breeze, and the slow cooking process yields incredibly tender meat. Enjoy this nutritious and delicious homemade porridge suitable for all ages!
Porridge Ingredients- 350g chicken thighs (trimmed of excess fat and skin, cut into bite-sized pieces)
- 1 paper cup (approx. 150g) glutinous rice (soaked for about 30 minutes)
- 1 stalk green onion (white part, about 10cm long)
- 1/2 medium onion (peeled and washed)
- 6-7 cloves garlic (peeled)
- 1/4 small carrot (finely minced)
Cooking Instructions
Step 1
First, rinse the glutinous rice thoroughly and soak it in water for about 30 minutes. Using brown glutinous rice will give your porridge a nuttier flavor and extra nutrients. One paper cup is a good amount for 1-2 servings.

Step 2
Rinse the chicken thighs under cold running water to remove any impurities. Chicken thighs are easy to handle as they are boneless and become very tender when cooked, making them ideal for porridge.

Step 3
Now, let’s prepare the vegetables for the porridge. Peel and wash the onion, and peel the garlic cloves. Wash the green onion, using mostly the white part. See? The ingredients are quite simple!

Step 4
Drain the soaked glutinous rice and place it into a mesh bag or cheesecloth. Tie it securely, ensuring there’s no air trapped inside. This prevents the rice from clumping and ensures even cooking, plus it makes it easy to remove later.

Step 5
Add the rinsed chicken thighs and the rice bag into the pressure cooker.

Step 6
Toss in the whole onion, green onion, and garlic cloves you prepared into the pressure cooker. Whole garlic cloves help to remove any gamey smell from the chicken and add a wonderful aroma.

Step 7
Finish preparing the remaining vegetables. Finely mince some of the onion and green onion that will be added to the porridge. Mince the carrot very finely as well. These minced vegetables will add color and texture to the finished dish.

Step 8
Close the lid of the pressure cooker. Once the pressure indicator starts to rise, reduce the heat to medium-low and continue cooking for about 13 minutes. Using a pressure cooker allows the chicken to become incredibly tender and easily shreddable in a short amount of time.

Step 9
Once the pressure has completely released from the cooker, carefully open the lid. First, remove the whole pieces of green onion, onion, and garlic that were added for broth.

Step 10
The chicken thighs, having been cooked under pressure, will shred very easily with a fork or chopsticks. The pressure cooker really does make the chicken wonderfully tender! This step is key to achieving a smooth porridge texture.

Step 11
Take the cooked glutinous rice out of the mesh bag and add it to the pressure cooker. Mix it well with the shredded chicken. The rice will be soft yet hold its shape, contributing to the perfect consistency of the porridge.

Step 12
As the porridge simmers, the chicken will naturally break down further, creating that signature creamy texture of dakjuk. It’s important that the rice grains don’t clump together but melt into a smooth consistency.

Step 13
Now, add the finely minced onion, green onion, and carrot that you prepared earlier, and let it simmer for a bit longer. This will infuse the porridge with the natural sweetness and aroma of the vegetables.

Step 14
Finally, season with salt and pepper to your taste. Let it simmer for a final moment to allow all the flavors to meld together, and your delicious chicken thigh porridge is ready! Wasn’t that simple?

Step 15
Using only chicken thighs is much more convenient than preparing a whole chicken. There are no bones or bones to deal with, making the cooking process very clean and easy. Plus, it generates less waste!

Step 16
This chicken porridge is a wonderfully nourishing and comforting meal, perfect for those times when you have a poor appetite or need a boost of energy. With the help of a pressure cooker, anyone can easily make it, even on busy days. Its rich flavor and nutritional benefits make it suitable as a baby food or a restorative dish for the entire family.


