The Best Way to Boil Sticky Corn
How to Boil Sticky Corn Deliciously Using a Pressure Cooker, Cooking Time and Tips

While I prefer sweet super sweet corn, the rest of my family loves sticky corn! After enjoying super sweet corn for a while, sticky corn has become available. So, I’ve been busy boiling and eating the sticky corn that my family loves. Here’s a detailed guide to boiling sticky corn perfectly in a pressure cooker for that chewy, sweet, and rich flavor.
Ingredients- 5-6 ears of sticky corn
- 1.3L water
- 1 Tbsp salt
- 6 Tbsp sugar
- A pinch of ‘New Sugar’ (optional)
Cooking Instructions
Step 1
First, prepare the corn you intend to boil. If you have leftover raw corn, wrap each ear individually in newspaper, place them in a zipper bag, and store in a kimchi refrigerator to keep them fresh. However, it’s best to consume them as soon as possible. For long-term storage, boiling and then freezing is the best method. Before boiling, peel off the rough outer husks, but leave the innermost husk layer intact. This inner husk helps to keep the corn more moist.

Step 2
Gather the peeled inner husks and corn silk that are relatively clean. When boiling, placing these flat on top of the corn in the pot will help retain moisture, ensuring a more succulent and richly flavored corn experience.

Step 3
When washing the corn, gently lift the remaining inner husks and rinse the corn kernels and husks thoroughly under running water to remove any impurities. Ensure they are washed clean.

Step 4
Pour 1.3L of clean water into the pressure cooker. Add 1 tablespoon of salt and 6 tablespoons of sugar, stirring well until they are completely dissolved. Pre-mixing the water this way helps the seasoning distribute evenly throughout the corn.

Step 5
If you prefer a sweeter taste, you can add a pinch of ‘New Sugar.’ This is optional, and the amount should be adjusted according to your preference. If you use ‘New Sugar,’ reduce the amount of regular sugar as it can make the corn overly sweet. Adjusting the sweetness is key to achieving the perfect flavor balance.

Step 6
Now, carefully arrange 5-6 ears of the cleaned sticky corn in the pressure cooker. The number of ears you can fit will depend on their size, so adjust the water quantity accordingly. Avoid packing the corn too tightly.

Step 7
After placing the corn, gently tuck the reserved corn silk into any empty spaces, ensuring it’s submerged in the water. The corn silk also contributes to the corn’s savory flavor and aroma.

Step 8
Finally, cover the corn evenly with the reserved inner husks you set aside earlier. These husks act as a protective layer, trapping steam and keeping the corn extra tender and moist during the cooking process – a secret to delicious corn!

Step 9
Before closing the pressure cooker lid, double-check that the whistle (pressure release valve) is securely in place. Turn the heat to high and begin boiling. Once the whistle starts to blow, reduce the heat to medium and continue to cook for about 15 minutes. After 15 minutes, turn off the heat and let the pressure cooker steam undisturbed for 3 minutes without opening the lid. This resting period allows the corn to cook evenly through.

Step 10
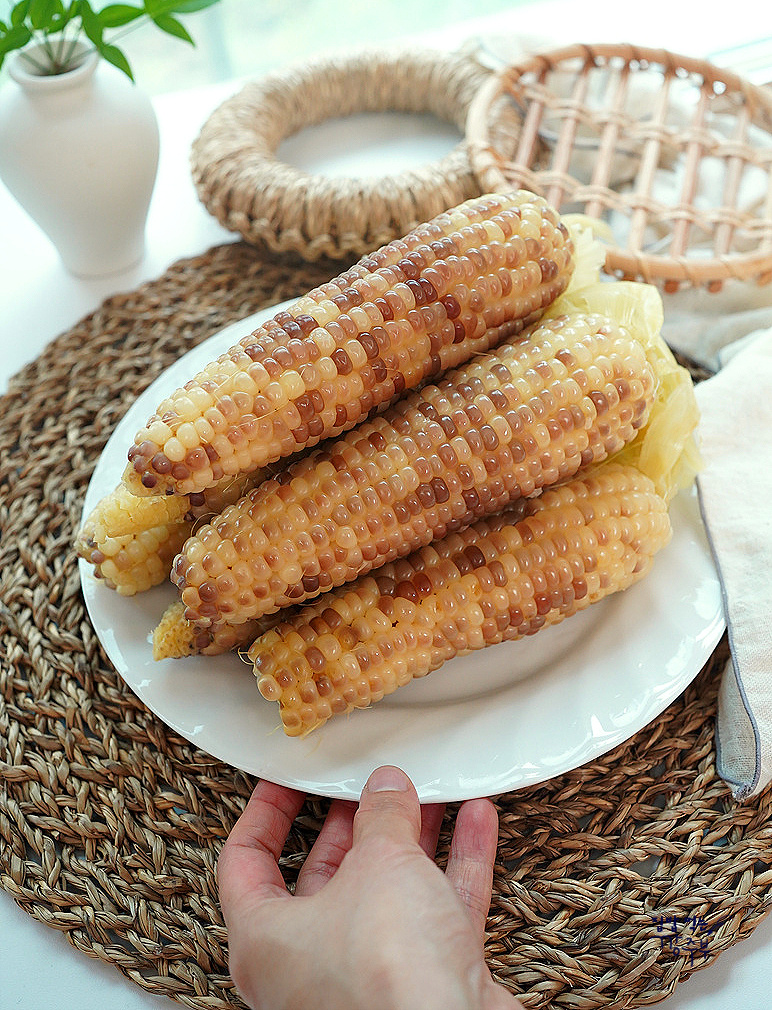
Look at that! Perfectly plump and delicious sticky corn is ready. Boiling with a pressure cooker truly brings out a chewier texture and richer flavor compared to a regular pot. Set aside the amount you wish to eat immediately. For the remaining corn, pack it hot into zipper bags or airtight containers and freeze. Leaving it at room temperature will cause it to shrivel and harden. Once frozen, you can take out ears one by one and reheat them in the microwave or steamer, and they’ll taste just as plump and delicious as freshly steamed corn. Remember these storage tips for enjoying your corn!


