Witch Hat Tuna Mayo Onigiri
Halloween Party Special: Adorable Witch Hat Shaped Tuna Mayo Onigiri (+Video Recipe)

Hello everyone! Mia here. Today, I’m bringing you a fun and festive recipe perfect for your Halloween party: Witch Hat Shaped Tuna Mayo Onigiri! These are great to make with kids and add a special touch to your home gatherings. Feel free to customize the filling based on your preferences! Let’s get into the Halloween spirit with these cute and delicious rice balls!
Witch Hat Onigiri (Makes 12)- 9 sheets Gimbap seaweed
- 2 bowls Cooked rice
- 1/2 Tbsp Sesame oil
- 1 pinch Salt
Tuna Mayo Filling- 2 cans Tuna (drained)
- 1/4 Onion (50g)
- 3 Tbsp Mayonnaise
- A pinch of Black pepper
- 2 cans Tuna (drained)
- 1/4 Onion (50g)
- 3 Tbsp Mayonnaise
- A pinch of Black pepper
Cooking Instructions
Step 1
First, take 6 sheets of gimbap seaweed and cut each in half lengthwise to create 12 rectangular pieces. These will form the sides of your witch hats.

Step 2
Take the remaining 3 sheets of seaweed and fold them twice to create a thicker strip.

Step 3
Cut these folded sheets into circles. Aim for 12 circles in total – these will be the brims of your witch hats. You’ll attach these brims to the cone shape later using a little rice.

Step 4
In a bowl, combine 2 bowls of cooked rice with a pinch of salt and 1/2 tablespoon of sesame oil.

Step 5
Mix the rice well with a spatula and let it cool slightly. It shouldn’t be too hot, as it might tear the seaweed.

Step 6
In a separate bowl, combine the drained tuna, finely chopped 1/4 onion, and 3 tablespoons of mayonnaise. Mix thoroughly.

Step 7
As the filling comes together, add a pinch of black pepper to your liking. For a little kick, you can also add finely chopped Cheongyang chili pepper or a dab of wasabi!

Step 8
Mix the pepper in well to complete your delicious tuna mayo filling. Enjoy!

Step 9
Now, let’s shape the hats! Place a thin layer of rice on one corner (the wider edge) of a rectangular seaweed strip. Then, add a generous spoonful of your tuna mayo filling on top. (Referencing the video will be helpful for shaping!)

Step 10
Cover the filling with a little more rice. Don’t make this layer too thick; it should be slightly translucent so the filling peeks through.

Step 11
Hold the bottom (wider edge) of the seaweed and shape the rice and filling into a cone by rolling it up tightly. Press firmly as you roll to compact the rice.

Step 12
Roll in one consistent direction to ensure the cone shape is neat and uniform.

Step 13
If the end of the seaweed slightly opens up after rolling, use a tiny bit of rice (like glue) to seal the edge securely.

Step 14
Gently press the sealed edge to ensure it stays in place.

Step 15
Now, let’s attach the brim. Apply a small amount of rice to the bottom edge of the cone-shaped onigiri. Then, carefully attach one of the circular seaweed pieces you prepared earlier to act as the hat brim.

Step 16
Place a small dab of rice in the center of the circular seaweed brim. This will be where the cone part of the hat attaches.

Step 17
Attach the cone-shaped onigiri (the hat top) to the brim using the rice dabbed on it, securing it firmly.

Step 18
Voila! Your adorable Witch Hat Onigiri is complete!

Step 19
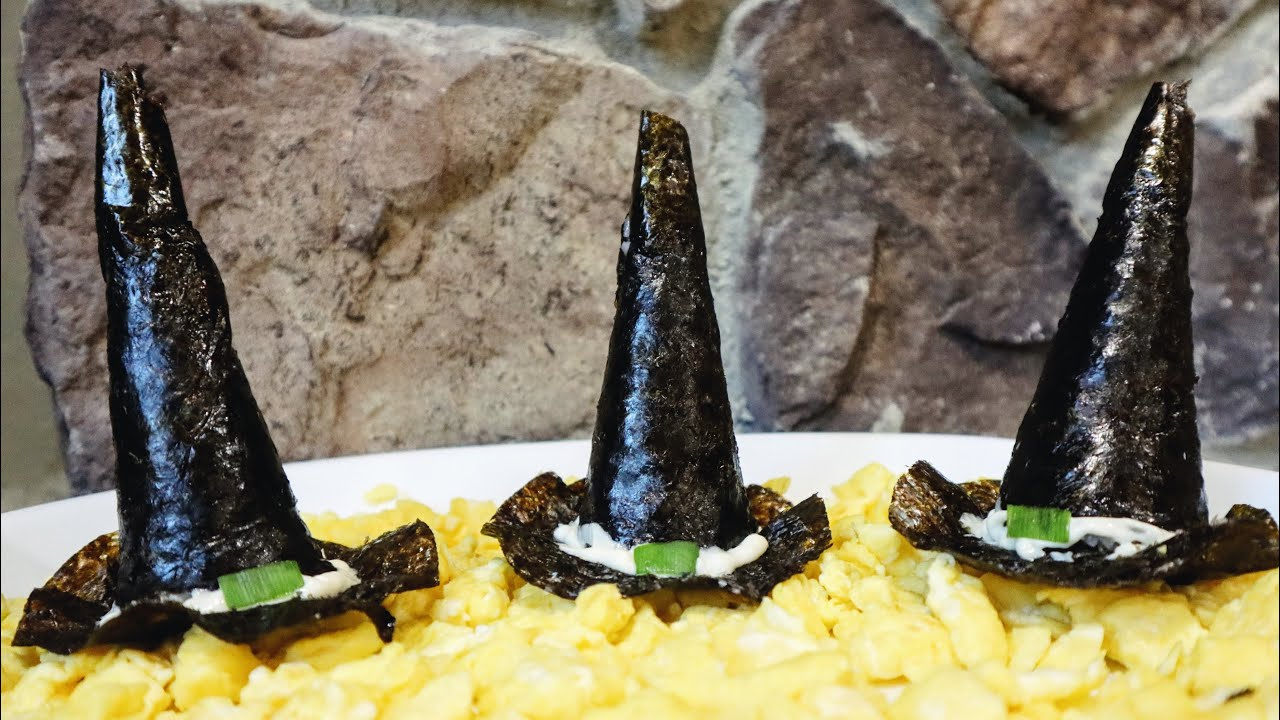
For extra decoration, pipe a ring of mayonnaise around the edge of the brim. Using a piping bag will give you a cleaner look.

Step 20
Finally, you can add a cute witch hat detail by finely chopping some green onion and dotting it onto the mayonnaise. (Optional)

Step 21
Here’s a cross-section of the finished Witch Hat Onigiri, revealing the delicious tuna mayo inside! Feel free to customize further by adding sesame seeds to the rice or mixing corn kernels or tobiko into the tuna filling for an even richer taste!


